Portfolio work

I scanned in some of my illustrations and neatened them up in photoshop. I enjoy using both traditional and modern techniques when finishing an illustration, it gives a hand rendered look but with the ability to remove the imperfections.
 This is the final illustration for my Urban Samurai project, in which I designed a capsule collection based on ancient Japanese warriors with a futuristic twist.
 This is a series of illustrations I made using a very loose sketching technique, using watercolours and fat markers.The collection is based on the seven deadly sins, and I used stereotypical images depicting the sins and made them into dresses.
For this illustration I decided to see how far I could get using only CAD software. I sketched the original image and scanned it in, then went over the lines using Adobe Illustrator. I'm pretty happy with the end result.

The Princess Bride

A moment to remember in fashion history.


Kate Middleton wowed the world when she stepped out to the press in this stunning Alexander McQueen wedding dress, designed by Sarah Burton. It has a lace appliqué bodice and skirt, and veil. The bride wore her hair down, with a tiara.

The lace on the dress details a rose, thistle, daffodil and shamrock, and was hand-made by the Royal School of Needlework at Hampton Court Palace.

The bridal train measures 2m 70cm, and along with the lace, all other fabrics used in the creation of the dress were sourced from and supplied by British companies.

The lace motifs were pinned, "framed up" and applied with stab stitching every 2mm to 3mm around each lace motif.

Workers washed their hands every 30 minutes to keep the lace and threads pristine, and the needles were renewed every three hours to keep them sharp.

Breaking and entering

The day of the photo shoot for my Anh Mao dress finally arrived! I knew exactly how I wanted it styled - Edgy make-up accessorized with androgynous hair and jewellery.
 This is the illustration I sent to the photographer so he could scout out a location that would suit the dress.
 We settled on an abandoned house, where the walls were adorned with graffiti. After picking our favourite wall we started the shoot.
 To get a nice smoky effect over the lens the photographer bought some smoke in a can, but this just made it look like the lens of the camera was dirty; We needed thicker smoke. To get this effect we set fire to some litter that was lying on the floor.
 Styled with feminine pearls and a masculine spiked collar. Cristy did a great job of modelling my dress.
 This is the graffiti we thought suited the shoot best.
I also styled the hair using jewellery I had made from safety pins, washers and nuts.

Miss Newcastle

 The theme for Miss Newcastle this year is Bollywood Glamour. For my model I have designed a tight fitting corset with gold embroidery, with a chiffon gathered skirt.
This is the final illustration. I kept in contact with my model to see what she thought of it and to see if she needed anything changed. As she is being sponsored by a hair extension company we decided to get rid of the head shawl just to be safe.
This is the fabric that I will be using for the corset. It is a soft duck-egg blue with gold embroidered feathers.
The chiffon for the skirt is a pale yellow with embroidered gold stars.

All work and no play makes me a dull boy

So after a busy day visiting galleries and exhibitions I felt some retail therapy was in order. I decided Camden Market was the best place to go as there are many unusual clothing shops, as well as a huge market which sold an immense amount of custom made clothing.
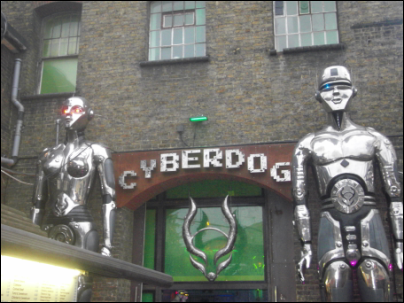
  My favourite shop by far had to be Cyberdog. It is an alternative brand clothing store dedicated to selling quasi-futuristic clothing. It's such a niche market yet Cyberdog stocks so many unusual items of clothing that people come from all over to see this unique store.
 Upon entering there were dancers everywhere. On podiums, in booths, some of the staff were even dancing on the tables. It was such a lively atmosphere, with dance music pounding from the speakers. It was more like a nightclub with the UV colour scheme and lighting. The energetic environment was so much more entertaining than trudging through boring mass-market clothes shops scouring rails for a bargain.
I had to be quite sneaky with my camera as no photos were allowed. Oops~

Not what it seems...

After visiting the V&A I took a detour to the Tate. I was interested in the display that used shadows to transform sculptures and project a different piece of art on the wall. 
This one was a bust projected on the wall, but the sculpture itself was made of lots of entangled penises (seriously). The exhibition was to make you think about more than the appearance of art and what it could convey from another viewpoint.

Trip to London

 So for part of my PPD project I decided to make a trip to London, as there are so many galleries and exhibitions.
The first gallery I visited was the V&A. There was an exhibition to do with recyclable fashion, which featured clothes made from second-hand materials such as newspapers, rubbish bags and tin cans.
In my opinion this dress was the highlight of the exhibition. It was made from thousands of origami cranes made from old newspapers.

Almost there

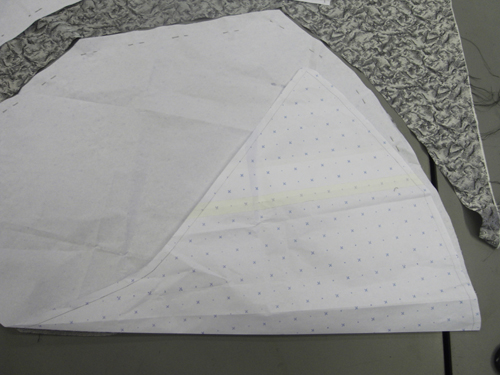
 The jacket pattern pieces were quite large so I had to work out the best way to cut them out in my fabric with minimal waste.
 The lining was an obstacle as I did not have enough to cut the pieces out whole.
In the end I had to seperate one of the pieces into seperate sections and cut the smaller pieces out of the remaining fabric.

Don't forget the sleeve

 Seeing as I was least confident with the sleeve it made sense to me to work it out first. The sleeve block we had in the studio was a bit to short for my design so I had to extend it. I also made the shoulder larger to accommodate a shoulder pad.
I had some mock button holes added to the end of the sleeve for some extra detail.

Grace Jones, this one's for you

 Pretty much all of the jacket pattern was made by using techniques I've been taught over the past few years. There was no block for a 'one-shouldered asymmetrical flared jacket' so I had to make my own.
I'm very happy with the fit of the jacket so I will be cutting out in my chosen fabric next week.

Hitch up that hem

 All that was left was to even the hem with the lining of the dress so that when it was sewn shut you wouldn't see any of the lining. I had to trim it slightly shorter than the length of the dress so that it wouldn't slip out when moving.
 All that was left was to sew it shut!
And here is the finished dress. And now for the jacket...

Blinding binding

 The original design called for the dress to be bagged out at the top, but the thickness of the fabric and the many layers that the collar detail had added made the dress too stiff to turn out without looking lumpy and amateurish. Instead I cut a strip of fabric on the bias and used it as binding to neaten the dress.
 Seeing as I didn't have mush fabric left I had to cut several strips and join them together before using them as binding for the top of the dress.

Final fabric fabulousness

 I finally started cutting out in my chosen fabric. It was quite nerve racking as I didn't have enough fabric to make a second dress if I made any mistakes. This pressure was kind of beneficial in a way as it made me focus more on the task at hand.
I spent a lot of time working on the collar as I had quite a bit of trouble with this in the toile stage.

Finishing touches

 The collar detail for the top of the dress was quite difficult to make as there was no pattern I could follow, so I had to draw one freehand and adjust it if any mistakes were made.
As you can see I clearly didn't measure the length properly and ended up with the collar coming up too short and not fitting into the side seam.

A tighter fit

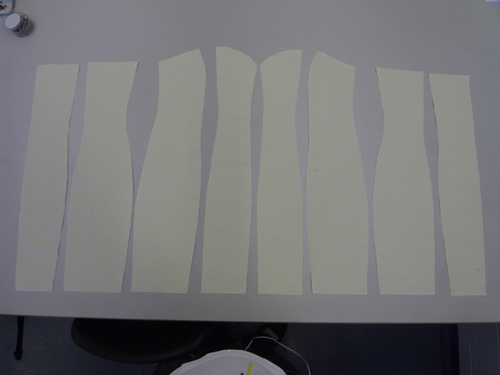
 With all the panel pieces laid out like this you can see how fitted the dress will be.
 As you can see it fits the stand very tightly which is the look I was going for.

And so it begins

 Started off by tracing the basic bodice block and altering it to suit my style.
 I cut the pieces out on the fold as the dress is symmetrical.
 I made alterations on the stand.
The dress after my first alterations.